The Mulch Volcano You See Everywhere
Drive through any neighborhood in the Puget Sound lowlands and you will spot them: cone-shaped piles of mulch, sometimes 8 to 12 inches high, mounded against tree trunks like tiny mountains. They are everywhere because they look intentional, like someone did something good for that tree. In reality, they are among the most damaging mistakes you can make.
That cone of mulch against the bark is suffocating your tree.
Mulch is valuable when applied correctly. But most trees in this region are mulched wrong, and the longer the mulch stays piled against the trunk, the more damage accumulates. In a few years, you will see the symptoms: stunted growth, thin canopy, bark decline, or sudden pest problems that should not be there.
The good news: fixing this is free, takes ten minutes, and your tree will respond within a season.
Why Mulch Matters Here
Look at the forest floor in a second-growth Douglas-fir or alder stand. You will see 3 to 6 inches of duff: decomposing leaves, needles, twigs, and the fine organic matter that builds over decades. That layer moderates temperature swings, improves drainage, holds moisture during dry spells, and feeds the biology that keeps roots healthy.
When we develop land, we strip all that away. We grade, compact, pave. Then we plant a tree in bare soil, give it some instant bark-dust mulch in a cone, and wonder why it struggles.
Mulch replaces the forest floor. That is its entire job. Not decoration. Not weed suppression (though it helps). The primary function is to recreate the conditions roots evolved to expect: cool, moist, biologically active soil in the top 12 inches where feeder roots do their work.
How to Mulch Correctly
Depth: 2 to 4 inches. The ANSI A300 soil management standard specifies this range, and the type of material determines where in it you land:
- Fine mulches (compost, aged bark, finely shredded wood): 2 to 3 inches. Fine particles compact quickly, and too much depth creates a mat that sheds water.
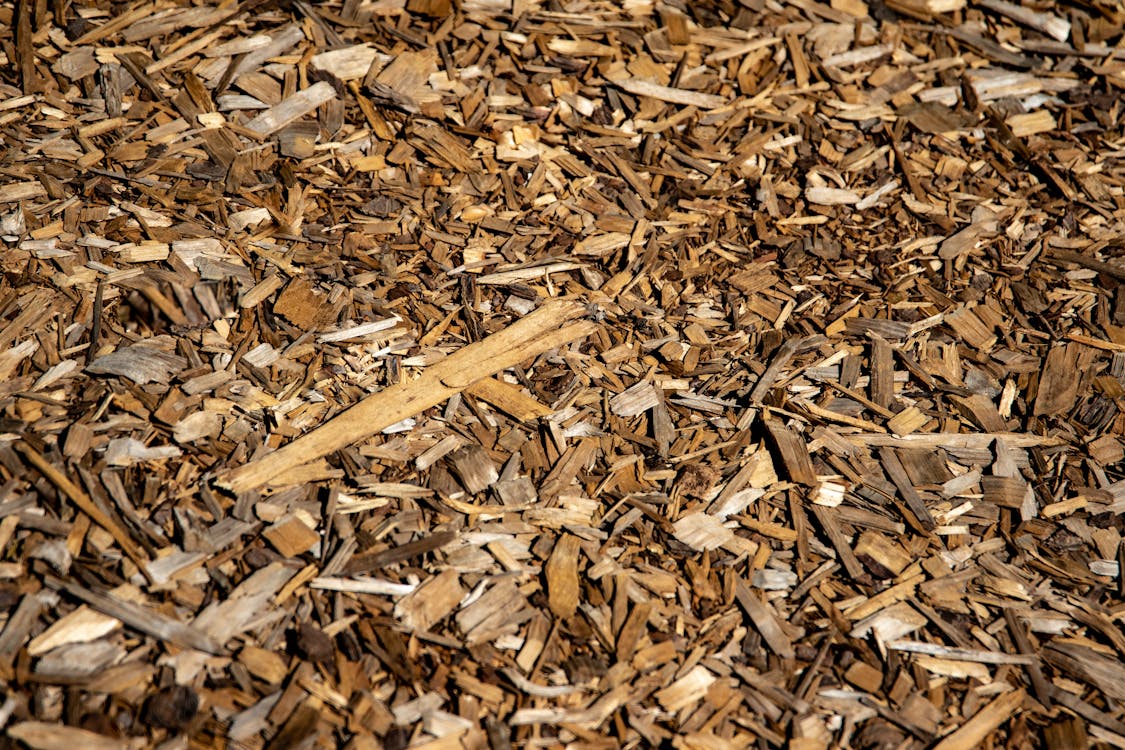
- Coarse mulches (arborist wood chips, fresh chips with bark and leaves): 3 to 4 inches. The A300 standard defines wood chip mulch as particles averaging 3/4 inch to 1.5 inches on the long axis, which is exactly what comes out of a chipper.
One adjustment worth making: if your soil drains poorly, lean toward the lower end of that range. If it drains fast, go higher. The soils across this region are more varied than most people assume; the dominant upland soil in King, Snohomish, and Pierce counties is actually a gravelly sandy loam over dense glacial hardpan, not the heavy clay people expect. Fast-draining upland soils benefit from a full 4 inches. Silt loam and clay on valley floors and in low-lying depressions hold water for months and do better with 2 inches. If you are not sure, start at 3. Our soil series library can help you identify what you are working with.
Pull mulch away from the trunk. Leave a 4 to 6 inch gap of bare soil between the mulch and the bark. Professional arboricultural standards are explicit: mulch shall not be placed against tree trunks or cover root flares. The mulch should form a ring, not a cone. The trunk needs air circulation around the cambium and phloem.
Extend mulch to the drip line. The minimum is a 3-foot-radius ring around the trunk (6-foot diameter). Larger is better. In forests, the duff layer covers the entire floor. In a residential setting, extend as far as you can manage. The feeder roots doing the real work extend well beyond the drip line, especially on mature trees, but start with that baseline.
Break up matted mulch annually. Mulch that has not been raked in two or three years compacts, sheds water like a roof, and creates anaerobic pockets. Each spring, gently rake the surface to restore structure. This also prevents the smell of sour mulch, which signals fungal decomposition problems.
The Mulch Volcano: What It Does to Your Tree
When mulch is piled against the trunk, several things happen in sequence, and most are invisible until damage becomes obvious.
First, the constantly moist mulch softens the bark. The protection layer that keeps pathogens and insects out breaks down. Bark beetles, fungal diseases, and other opportunistic pests find bark that is easier to penetrate. You will often see small holes appearing in the bark, or dark staining that suggests fungal entry.
Second, the tree responds to this warmth and moisture by triggering adventitious roots, roots that grow directly from the buried stem into the mulch layer. This looks like the tree is rooting itself deeper and anchoring better. It is not. The tree is reacting to the moist environment. When dry weather comes and that mulch dries out (and it will), those adventitious roots die. The tree develops a network of dead tissue inside the mulch zone, and next summer the problem repeats.
Over time, you get stem-girdling roots: roots that circle the trunk and constrict growth like a tourniquet. At that point, the tree is in trouble. Growth slows visibly, the crown thins, and sometimes the tree dies before the root is even noticed.
The bark itself, kept perpetually wet and oxygen-starved by the mulch pile, begins to suffocate. The phloem, the living tissue under the bark that transports sugars, cannot function in anaerobic conditions. Once the phloem is compromised, the tree cannot move nutrients down to the roots, and the roots cannot support the crown. You get decline that looks nutritional or disease-related when the real problem is mulch management.
Which Mulch to Use
Arborist wood chips are the gold standard. If you can get them, use them.
Fresh chips with bark and leaves intact outperform every other mulch type in controlled research. They improve soil structure, moisture retention, and tree health better than bark, compost, gravel, or landscape fabric, and break down slowly enough to provide sustained benefit.
Better yet: they are free. Local tree services generate chips constantly. ChipDrop (chipdrop.com) connects homeowners with arborists who have free chips to drop off. A half-cord of arborist chips is worth $100 to $200 if you had to buy it. You can often get several loads delivered for nothing.
Organic vs. inorganic: Stick with organic. Rubber mulch, lava rock, and other inorganic options do not improve soil structure or biology. They look tidy but do nothing for the two primary jobs: moderating temperature and building organic matter.
Dyed mulch (red, brown, black): Cosmetic only. Dyes are added for color retention, and some sources recycle contaminated wood waste. Stick with natural chips. Natural wood looks good after one season of weathering anyway.
Compost: Excellent if you have it, but usually more expensive than free chips. Use 2 to 3 inches on any soil type, since fine material compacts easily.
Avoid: Fresh grass clippings (pH shifts, anaerobic breakdown, sour smell); straw or hay (seeds); rubber; stone. The A300 standard specifically recommends against plastic sheeting as mulch. Plastic blocks water infiltration and air exchange and creates perched water tables, which is exactly the opposite of what you need.
Disease-specific caution: If you are managing trees susceptible to root rot diseases, keep mulch depth at 2 to 3 inches maximum and pull it back at least 6 inches from the trunk or root crown. For roses and ornamental cherries prone to canker diseases, use coarse bark rather than fine mulch for winter protection; high-moisture-retention materials encourage the fungi that cause canker.
When to Apply or Refresh
Two optimal windows exist in this region:
Fall (October to November). Apply mulch before the heavy rains arrive. This protects soil structure from the erosion and compaction that comes with winter precipitation. It moderates soil temperature swings in late fall and early winter. In the Puget Sound lowlands, mulching in October gives the layer time to settle before November rainfall intensifies.
Spring (March to April). Apply after soil temperature begins to rise slightly but before summer drought stress. Spring mulching has the added benefit of suppressing cool-season weed germination and protecting emerging perennials.
When NOT to refresh: Do not re-mulch just for color or because a calendar says so. Check depth first. If adequate depth remains (2 to 3 inches), rake gently to break up compaction. If mulch has thinned to 1 inch or less, add more. On most sites, annual raking plus topping off every 2 to 3 years is sufficient. Over-mulching is easier to do than you would think.
Common Mistakes (Beyond the Volcano)
Too much mulch (>4 inches). Creates matted, anaerobic conditions. Water runs off instead of penetrating. Limits oxygen. On sites that already drain poorly, the threshold is even lower.
Assuming your soil is all the same. See the depth guidance above. A soil probe or a test hole tells you more than the default assumption of “clay.”
Plastic sheeting under mulch. Creates a barrier that prevents water infiltration and air exchange. If you are fighting weed pressure, pull by hand. Plastic makes things worse long-term.
Fresh grass clippings as mulch. They pack down, create anaerobic pockets, smell sour, and pH shifts discourage root growth. Use only if aged or composted first.
Forgetting the December rodent check. Mulch piled near tree and shrub bases creates hiding spots for voles and other rodents that girdle bark in winter. Maintain that 4 to 6 inch trunk clearance zone, and check it when temperatures drop.
Seasonal Action Summary
| Season | Action |
|---|---|
| October-November | Apply 2-4 inches of fresh arborist chips (adjust depth to your soil’s drainage). Pull back 4-6 inches from trunk. Extend to drip line minimum. |
| Winter | Monitor for erosion and rodent activity near trunks. Top mulch as needed if winter rains expose soil. |
| March-April | Rake surface to break compaction. Top off depth if fallen below 2 inches. Consider spring application if fall mulch was skipped. |
| May-August | Monitor depth during dry spells. Water well if mulch is dry (mulch keeps soil cool, but does not replace irrigation). Do not add new mulch during active growth unless necessary. |
| September-Early October | Assess depth. Plan fall application. Source chips (ChipDrop, local arborists). |
The Result
A free pile of wood chips, 20 minutes of work, and you have replicated the forest floor conditions that trees evolved under. It is one of the three foundational practices in any plant health care program, alongside proper watering and correct siting. One season to see the difference, two to see it clearly.
Sources
- Impact of Mulches on Landscape Plants and the Environment - A Review – Chalker-Scott, L., Journal of Environmental Horticulture 25(4): 239-246, 2007
- “Effects of mulch depth on soil conditions and tree growth in an urban environment” – Struve, D. K., & Buhler, W. G., Journal of Arboriculture 28(5): 212-218, 2002 (print reference)
- “Proper Mulching Techniques” – International Society of Arboriculture, TreesAreGood educational resource series, 2021 (print reference)
- Tree, Shrub, and Other Woody Plant Management: Standard Practices – ANSI A300 (Part 2)-2004, Tree Care Industry Association (print reference)
- Official Series Descriptions: Alderwood, Everett, Woodinville, Bellingham – USDA-NRCS (print reference)
- “A Home Gardener’s Guide to Soils and Fertilizers” – Cogger, C. & Benedict, C., WSU Extension EM063E, 2020 (print reference)