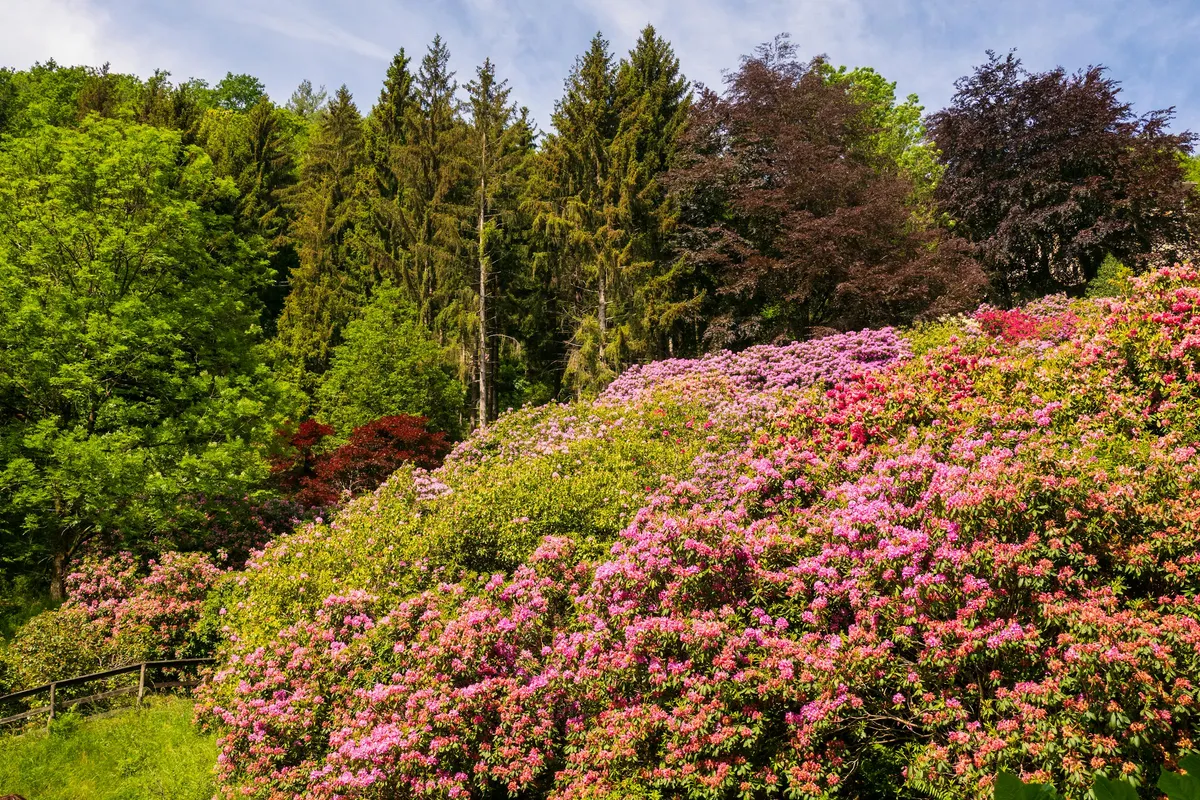
You already know when your rhododendrons bloom. You watch the trusses swell, the color arrive, the show peak and fade. What most gardeners miss is that the two weeks after bloom are the most important weeks of the rhododendron year, and they have nothing to do with flowers.
Post-bloom is a diagnostic window. Three signals are visible right now that predict whether your rhododendron will thrive or decline next season: the condition of spent petals on the ground (disease), the undersides of leaves on sun-exposed branches (pests), and the quality of new growth emerging from shoot tips (roots). If you deadhead, fertilize, and walk away, you miss all three. Read those signals and act on them before the window closes.
The Two-Week Window
Most rhododendrons in the Puget Sound lowlands finish bloom between mid-April and mid-May, with the bulk of elepidote hybrids peaking in the first two weeks of May. That window varies by species and microsite: early-blooming PJM types finish by late March; late species like R. maximum hybrids may hold into June. But for the majority of garden rhododendrons here, mid-May is the moment.
What makes this timing critical is convergence. Three biological clocks align in the same two-week span. Ovulinia petal blight spores have already infected flowers during bloom, and the fungus is now colonizing fallen petals, working toward the sclerotia that will overwinter and reinfect next spring. Azalea lace bug first-generation nymphs have hatched (1099 GDD₃₂; all seven Puget Sound stations passed this threshold in the first week of May) and are feeding on leaf undersides right now. And the growth flush that started at bud break is elongating, which means root problems that were invisible during dormancy are suddenly readable in pale, stunted, or wilting new leaves.
No other moment in the year puts disease management, pest scouting, and health assessment in the same visit to the same plant. The actions below are organized by that visit: work your way from the spent flowers at the top, down through the foliage, to the root zone at the base.
Deadheading as Disease Management
Start at the top. Snap each spent truss at its base where the flower stem meets the branch, just above the rosette of leaves below it. One hand steadies the branch; the other grips the truss stem and bends it sharply sideways until it snaps clean. You are not cutting into the branch, and you are not disturbing the two fat buds flanking the truss, which are next year’s flowers. On a healthy plant, the stem breaks cleanly with a soft pop. If it tears or feels woody, use bypass pruners and cut flush.
This is not cosmetic work. In the Puget Sound lowlands, Ovulinia petal blight is endemic wherever rhododendrons grow in maritime moisture. The fungus infects open flowers during cool, wet weather (10 to 20°C with rain on bloom), produces water-soaked spots that spread rapidly into slimy brown tissue, and then colonizes fallen petals on the ground. Within eight weeks of infection, black sclerotia form inside the thickened tissue of the flower throat. Those sclerotia overwinter in soil and leaf litter, germinate into cup-shaped apothecia the following spring, and release ascospores into the next bloom cycle.
Deadheading breaks this cycle at the most accessible point. If you remove spent flowers before they drop and before the fungus completes sclerotia formation, you are removing next year’s inoculum. This is not a guarantee; sclerotia from neighboring properties, from missed flowers, or from wild R. macrophyllum in nearby woodlands will still produce spores. But reducing the inoculum load directly under your plants measurably reduces infection severity the following year. The PNW Plant Disease Management Handbook recommends removal of fading flowers as the primary cultural control.
Rake fallen petals from beneath plants as well. Do not compost them. Bag them or dispose of them in yard waste collection. Petals that have already dropped may already carry developing sclerotia, and composting temperatures in home piles rarely reach the sustained heat needed to kill fungal structures.
For large collections (50 or more plants): prioritize plants that showed petal blight symptoms this year. Healthy flowers that faded naturally to brown without the characteristic slimy collapse are lower priority, though removing spent trusses still benefits those plants by redirecting energy toward vegetative growth rather than seed production.
The Botrytis distinction: Botrytis cinerea also causes petal spots on rhododendrons in our wet springs. The early symptoms look similar: small water-soaked spots on petals. But Botrytis spots stay smaller, do not progress to the full-petal slimy collapse that marks Ovulinia, and produce gray fuzzy sporulation rather than embedded black sclerotia. Both benefit from the same cultural control: remove spent flowers, clean fallen petals, improve air circulation. If you are seeing slimy, rapidly collapsing flowers, you are dealing with Ovulinia.
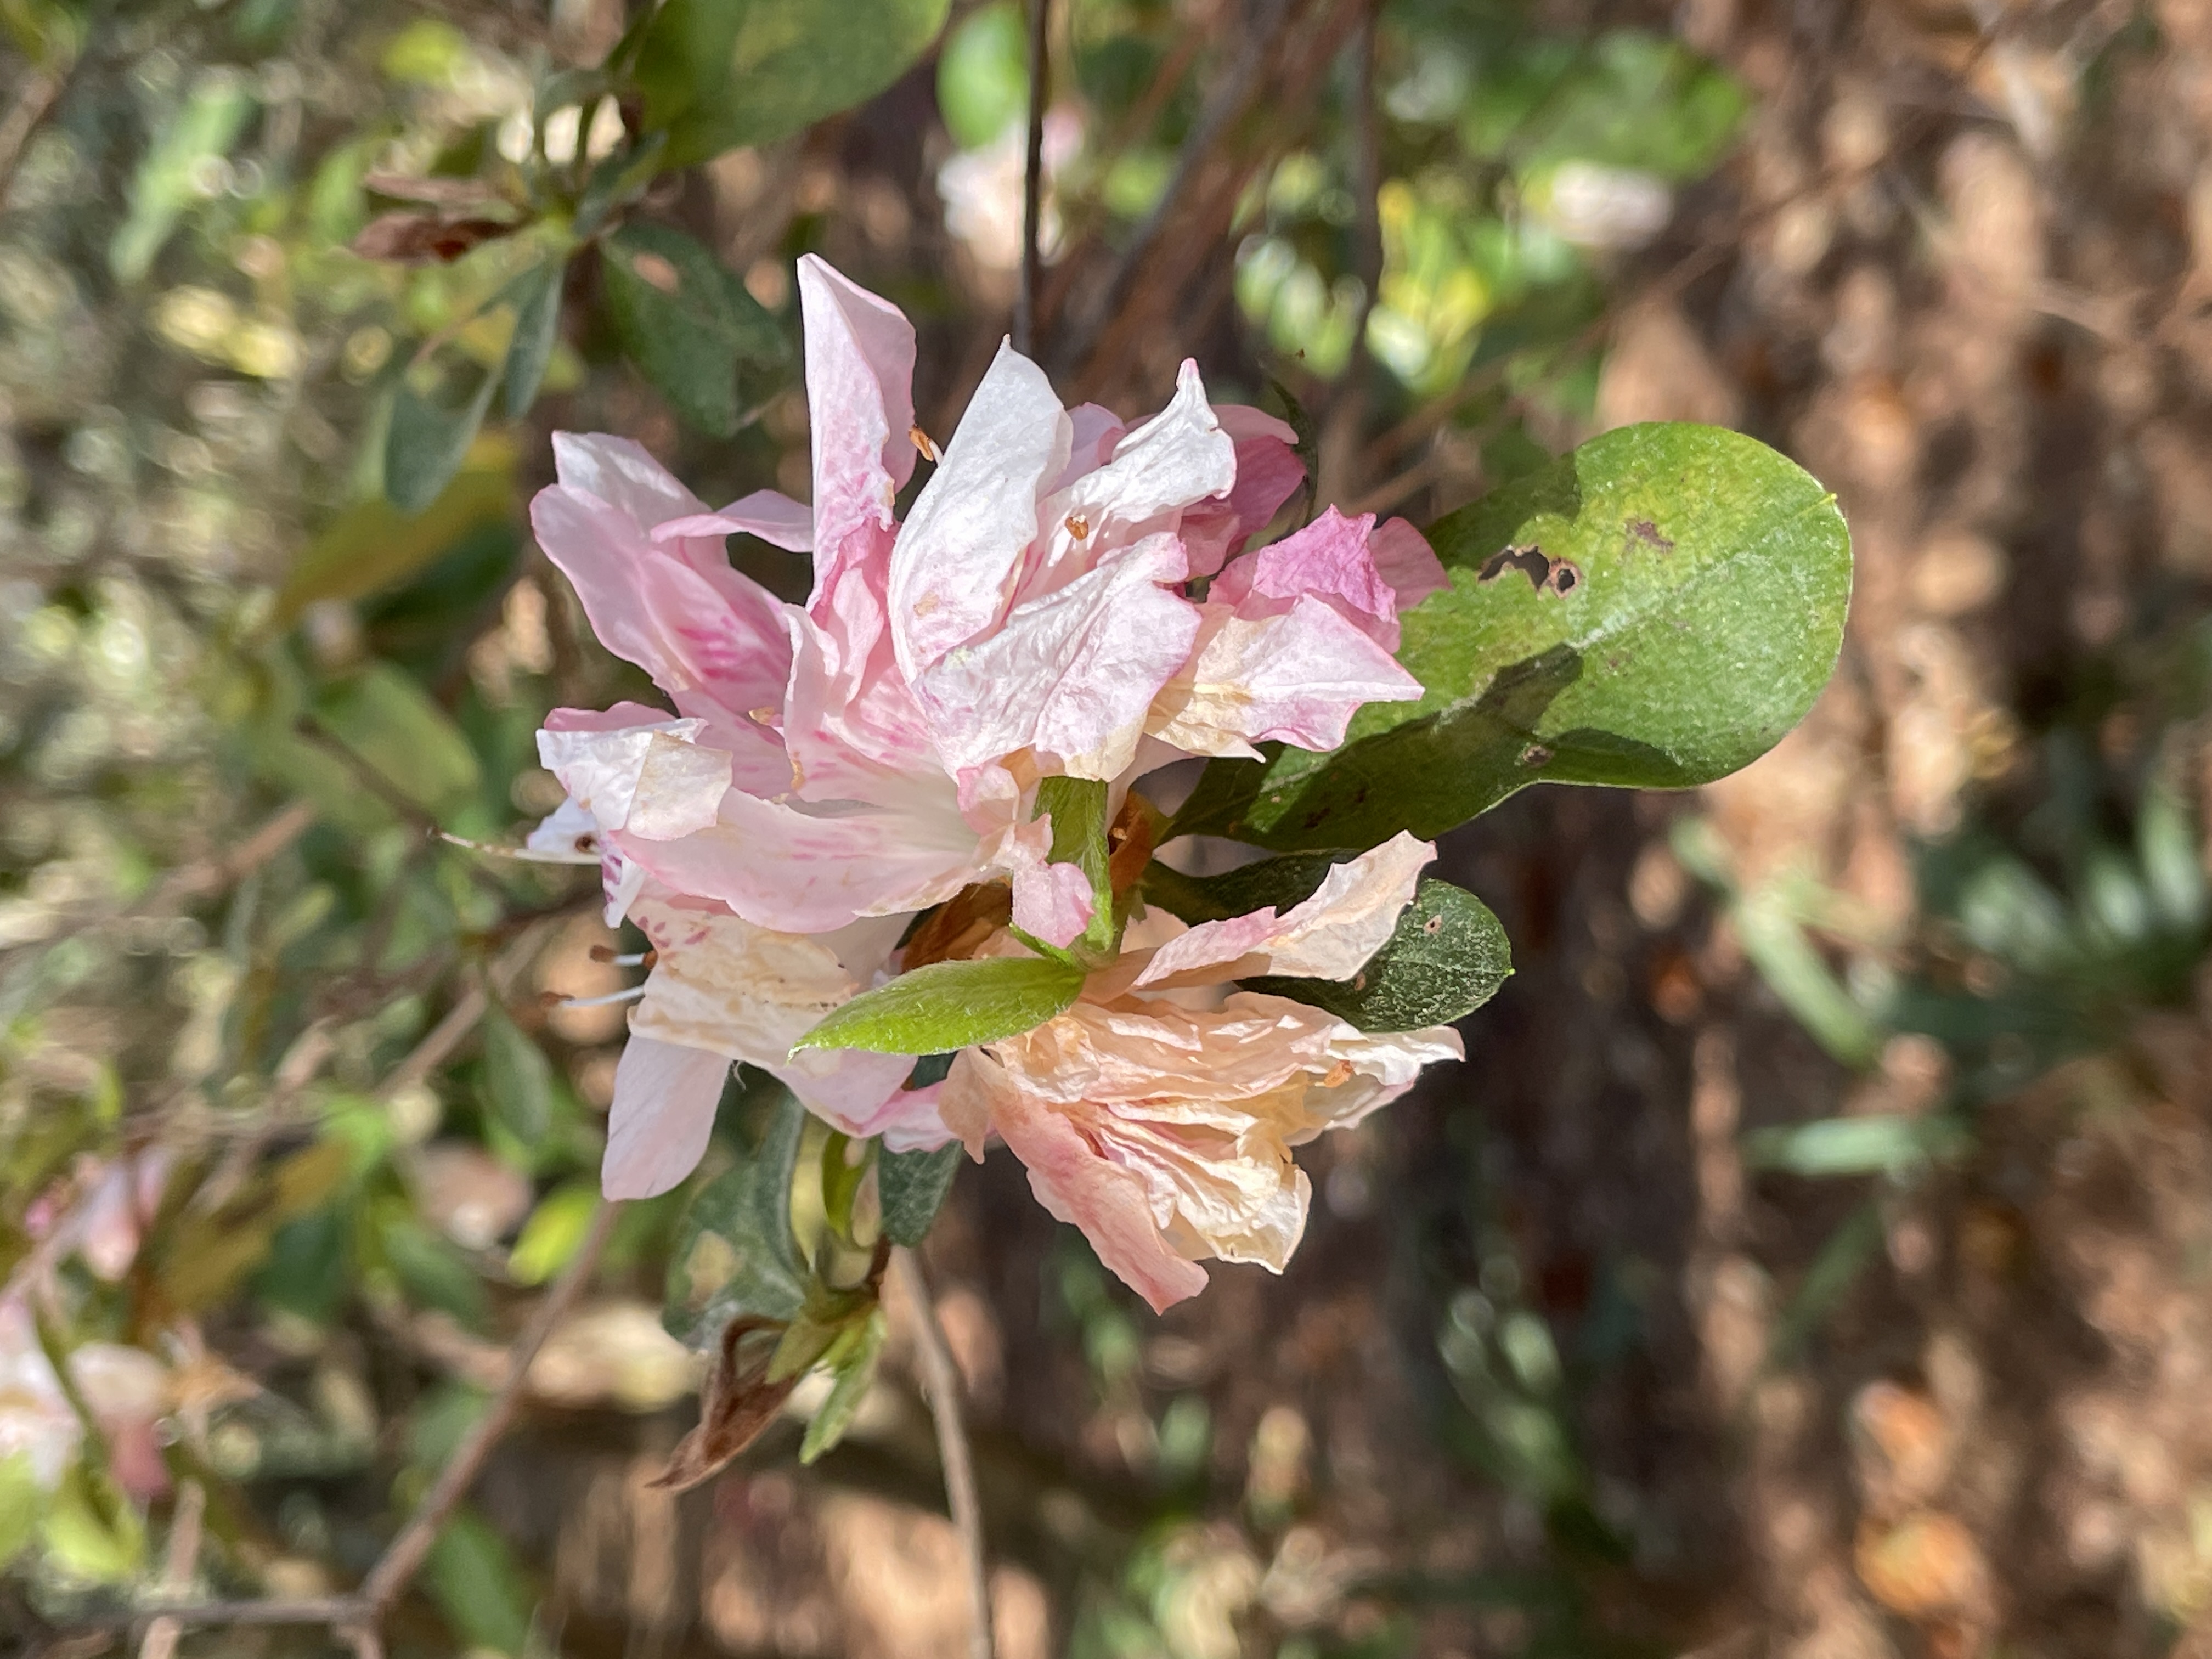 Ovulinia petal blight on rhododendron flowers showing characteristic water-soaked, browning petals. Photo: m.borden, Wikimedia Commons, CC BY-SA 2.0.
Fertilization After Bloom
The growth flush that follows bloom is the biggest demand on your plant’s nutrient reserves all year. New shoots elongate, new leaves expand and harden, and the plant sets the buds that will become next year’s flowers. Fertilization timed to this flush supports all three processes.
When: Immediately after bloom through June 30. This is a hard cutoff. Nitrogen applied after July 1 pushes soft new growth that will not harden off before the first frost, and in our mild autumns that frost may not arrive until November, meaning the plant keeps growing tender tissue for months. The damage shows the following spring as dieback on shoot tips that never lignified.
What: An acid-forming fertilizer formulated for ericaceous plants. The active nitrogen source matters: ammonium sulfate or urea-based formulations acidify the soil as a side effect of nitrogen uptake, which is exactly what rhododendrons need. Cottonseed meal is a good organic option. Holly-Tone and similar granular ericaceous blends work well for gardeners who want a single product. Avoid calcium nitrate or potassium nitrate formulations, which push soil pH upward.
How much: Follow the product label. More is not better on shallow-rooted ericaceous plants. Rhododendron roots sit in the top 6 to 8 inches of soil, and concentrated fertilizer in that shallow zone can burn the fine feeder roots that the plant depends on. Broadcast granular fertilizer at the drip line and water it in. Do not pile it against the trunk.
The pH connection: This is where most post-bloom fertilization guides stop, and where the real problem starts. If your soil pH is above 6.0, your rhododendron cannot access iron and manganese regardless of how much fertilizer you apply. The nutrients are in the soil; the chemistry locks them out. The symptom is interveinal chlorosis on new growth: the leaf veins stay green while the tissue between them turns yellow. If you see this pattern on the fresh flush right now, do not add more fertilizer. Fix the pH first.
Soil pH: The Invisible Problem
Rhododendrons evolved in acidic forest soils. The entire Ericaceae family, including blueberries, Pieris, and Kalmia, requires a soil pH between 4.5 and 6.0 for normal nutrient uptake. Above 6.0, iron precipitates into forms the roots cannot absorb. Above 6.5, manganese follows. The plant starves in fertilized soil.
In the Puget Sound lowlands, this is a persistent problem. Our native forest soils are often acidic enough, but developed landscapes are a different story. Concrete foundations leach calcium. Irrigation water from municipal sources runs alkaline. Fill soils from construction are almost never tested before planting. The result is a rhododendron that looked fine for five years and now shows progressive chlorosis that no amount of feeding corrects.
Test first. A soil test every two to three years is the only way to know where you stand. The WSU Soil Testing Lab provides pH along with nutrient analysis. Home pH meters work for a quick read but drift over time; calibrate or replace them.
Amending with sulfur. Elemental sulfur is the standard amendment for lowering soil pH. Soil bacteria convert it to sulfuric acid over time. WSU Extension recommends 1.5 to 2.5 pounds per 100 square feet to lower pH by 0.5 unit. In our clay soils, this conversion takes 6 to 12 months, not the weeks that sandy-soil research from the Southeast implies. Plan accordingly. Apply in spring or fall when soil bacteria are active. Repeated small applications (annually, based on re-testing) are more effective than a single large dose, because clay buffers aggressively against pH change.
Do not use aluminum sulfate. This is the common recommendation in national guides and on the back of many retail products, and it is the wrong choice in Puget Sound clay. Aluminum sulfate lowers pH faster than elemental sulfur because it acts chemically rather than biologically, but Puget Sound clay soils already contain significant aluminum. Adding more creates toxicity risk: aluminum damages fine roots at elevated concentrations, producing symptoms that mimic the very nutrient deficiency you were trying to fix. Use elemental sulfur instead.
Ericaceous mulch for the long game. A 2- to 3-inch layer of pine needles, composted bark, or conifer duff provides slow, steady acidification as it decomposes. This is the gentlest pH management tool available, and it does double duty: it insulates the shallow root zone, retains moisture, and supports the mycorrhizal fungi that ericaceous plants depend on for nutrient uptake. Replenish annually as it breaks down.
Immediate relief for chlorosis. If your plant is visibly chlorotic right now and you need results before sulfur takes effect, apply chelated iron in the EDDHA form (sold as Sprint 138 or equivalent). EDDHA chelates remain stable up to pH 9.0, unlike EDTA chelates that break down above 6.5, which is precisely the pH range where your plant needs help. Apply as a soil drench at the drip line. This treats the symptom while sulfur corrects the cause.
Pest Check: What to Scout Now
While you are at the plant deadheading, check the foliage. Two pests are active during the post-bloom window, and both leave visible evidence that takes thirty seconds to find.
Azalea lace bug. The pest most gardeners in this region call rhododendron lace bug is actually the azalea lace bug (Stephanitis pyrioides), and it arrived in the Puget Sound region relatively recently. The rhododendron lace bug guide covers identification and the full IPM protocol. For post-bloom scouting, do this: flip a leaf on a sun-exposed branch and look at the underside. If you see dark, varnish-like spots (frass) and small, pale, wingless nymphs clustered along the midrib, the first generation is feeding. Check the upper surface of the same leaf: yellow stippling, a fine pale speckling that looks like the leaf is losing color from above, confirms active damage.
First-generation egg hatch occurs at 1099 GDD₃₂ (converted from the source research at 214 GDD₅₀; for context on why we convert, see the growing degree days guide). As of mid-May, all seven Puget Sound stations are past this threshold, meaning nymphs are active now. Early detection matters because lace bug populations build across three generations per season. The first generation is the easiest to manage with targeted contact sprays (insecticidal soap, horticultural oil, or neem) because populations are small and concentrated.
Root weevil. Black vine weevil adults emerge from the soil in May and June and feed on leaf margins at night, leaving characteristic half-moon notches along the edge. The notching damage itself is cosmetic, but it signals something worse: the larvae underground were feeding on roots all spring, and the adults now emerging will lay eggs that produce the next generation of root-feeding larvae by late summer.
Check leaf margins for fresh notching, especially on lower branches near the ground. If you find it, the management window for beneficial nematodes (Heterorhabditis bacteriophora) opens when soil temperature exceeds 55°F (13°C). In most Puget Sound locations, soil temps crossed this threshold in late April to early May. Apply nematodes in the evening, water them in thoroughly, and keep the soil moist for two weeks after application. The nematodes target larvae in the soil, which is where the real damage occurs.
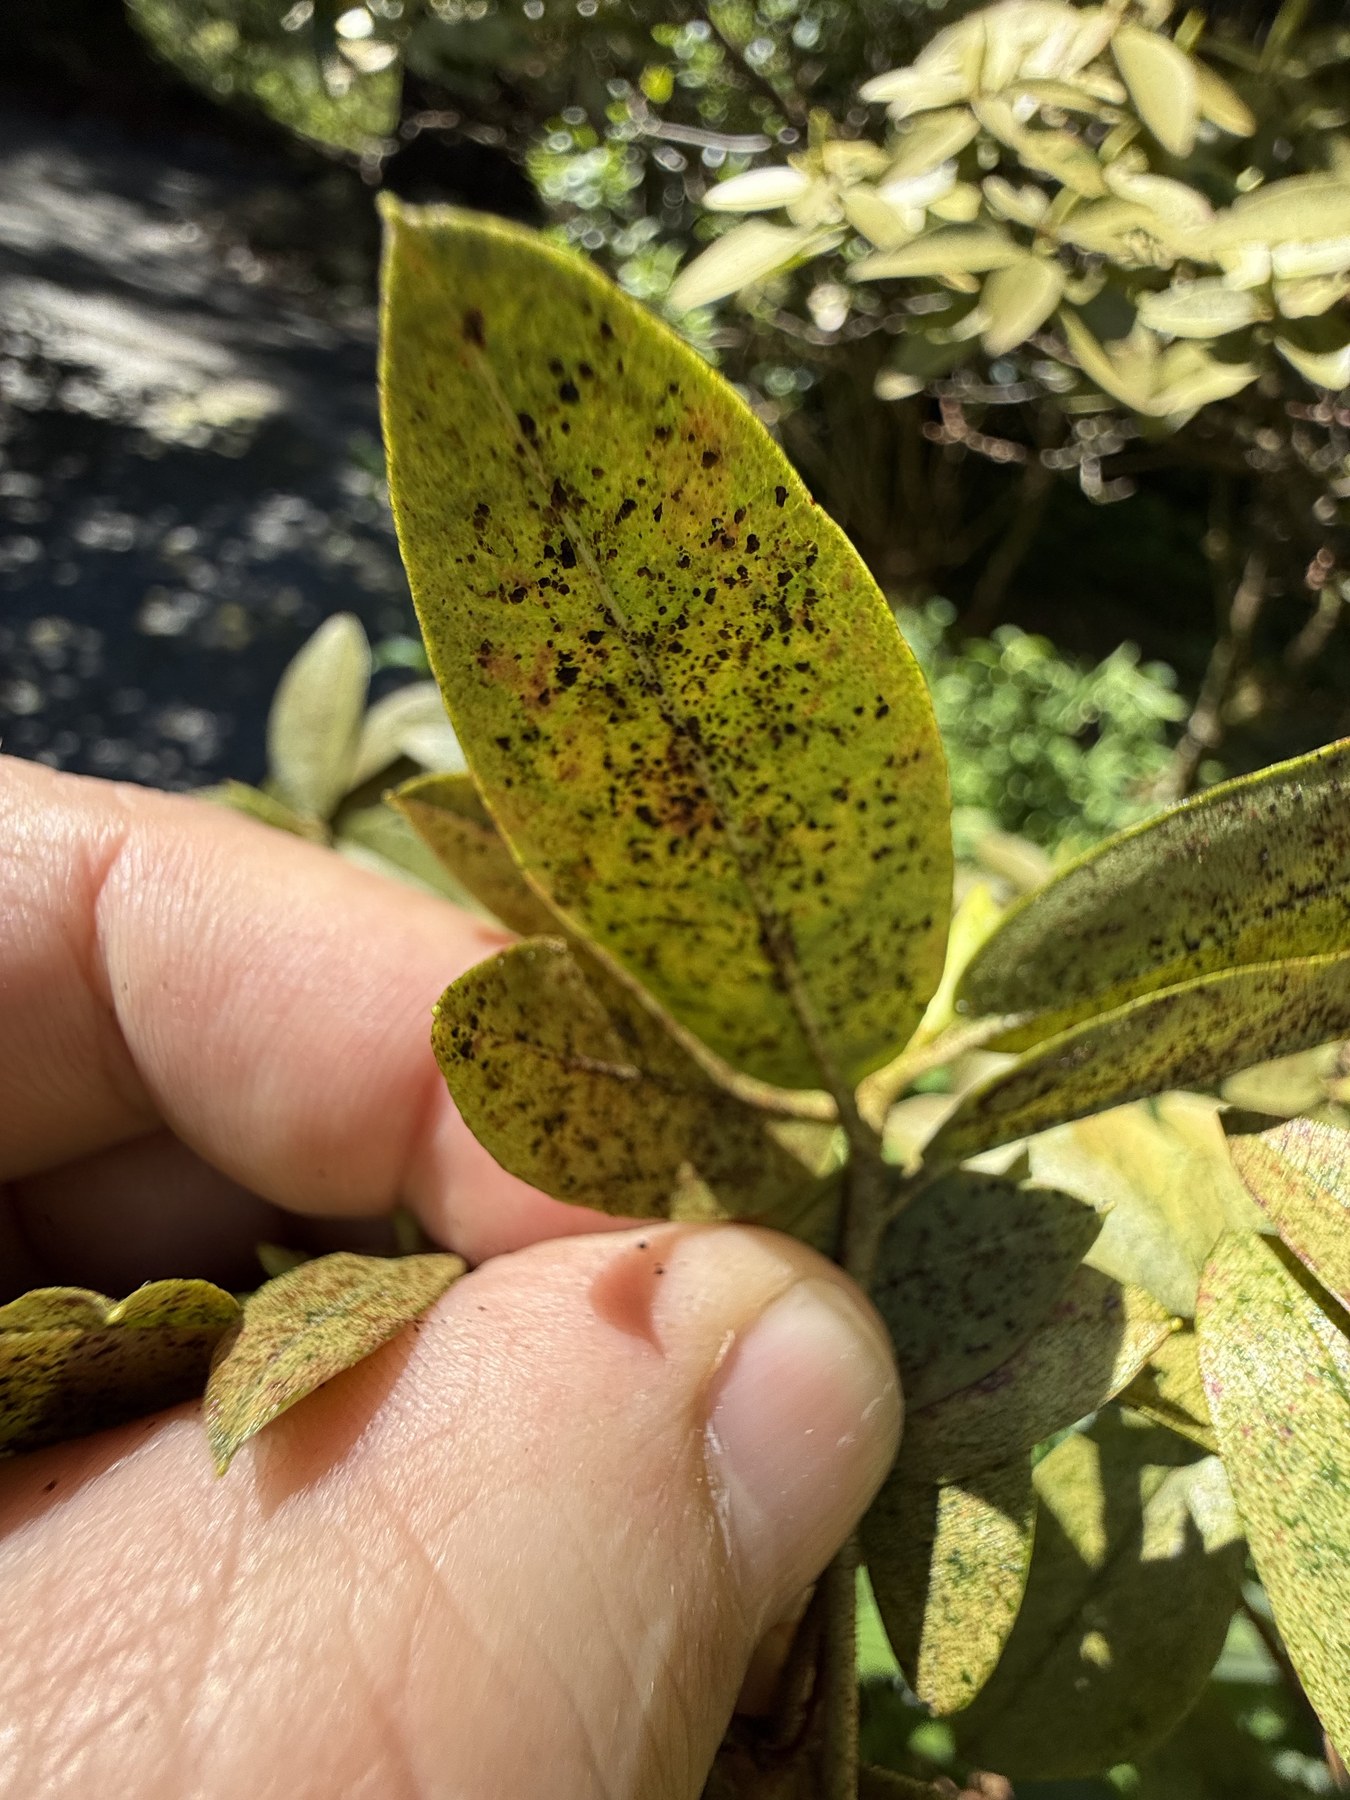 Advanced azalea lace bug stippling on rhododendron leaf. Photo: Chris Welch, HortGuide.
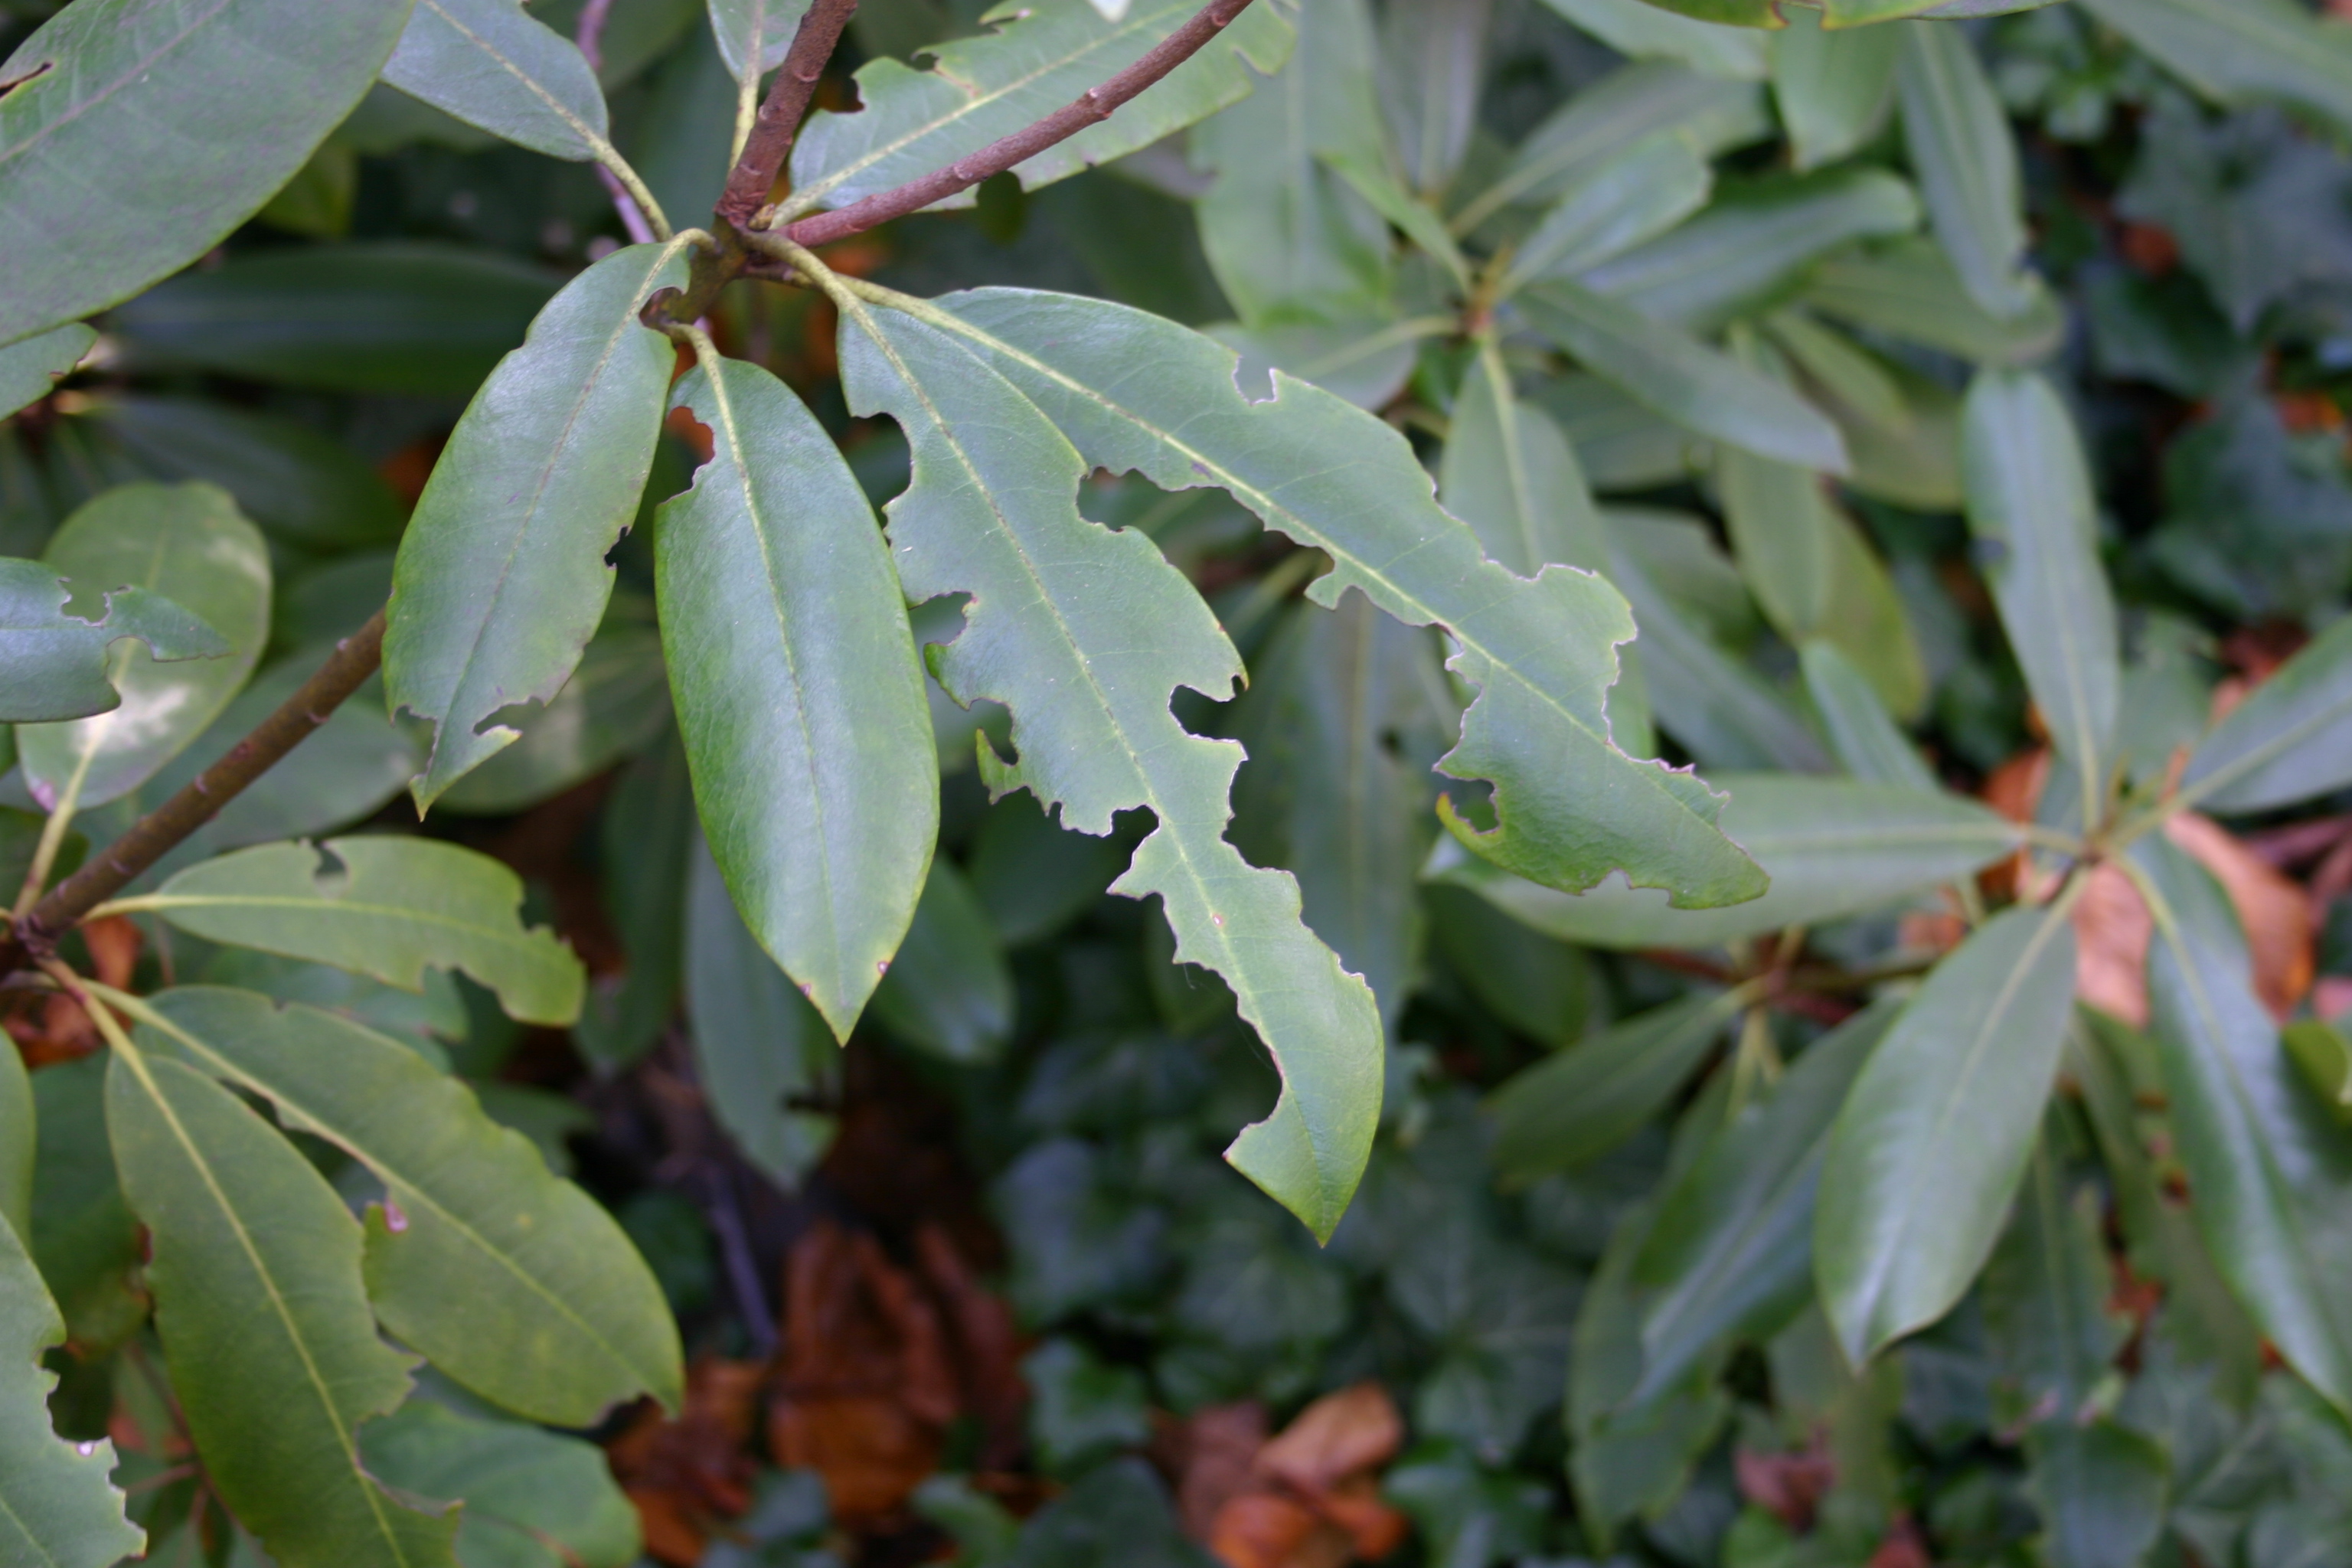 Root weevil notching on Rhododendron maximum leaf margins. Photo: SB_Johnny, Wikimedia Commons, CC BY-SA 3.0.
Reading the Growth Flush
The last signal is at the shoot tips. Healthy new growth emerges light green, elongates steadily through May and June, and hardens off into dark, glossy foliage by July. This flush tells you more about root health than any diagnostic you can run above ground.
What healthy looks like: Vigorous new shoots 2 to 6 inches long (depending on cultivar), uniformly light green, with leaves unfurling symmetrically. The plant looks like it is reaching forward.
What trouble looks like: Partial flush (some shoots push, others sit dormant). Yellow or pale new leaves (nutrient access failure, see pH section above). Wilting new growth on warm afternoons that does not recover by morning (root damage). Stunted, sparse shoots with small leaves (chronic decline). Any of these patterns warrant investigation below the soil line.
Phytophthora root rot is the primary root disease of rhododendrons in poorly drained Puget Sound soils. It is an oomycete, not a true fungus, and it thrives in saturated soil, exactly the condition our clay creates during wet springs. The Catawba rhododendron guide covers root rot prevention and siting in detail. Here, the question is diagnosis: is the poor flush you are seeing a root problem?
Gently excavate around the root crown, pulling mulch and soil away from the base. Healthy roots are white to tan, firm, and branching. Infected roots are brown, mushy, and may have a sharp, sour smell. If the root crown itself is darkened or soft, the infection is advanced. Look also for the drainage pattern: if water stands around the base of the plant for more than four hours after rain, the site will eventually kill even a resistant cultivar.
What to do if roots are compromised: Improve drainage first. Raised planting, a French drain, or regrading to redirect surface water are the structural fixes. Fungicides (mefenoxam, phosphorous acid) can slow Phytophthora but do not cure established infections. If the plant is in active decline with more than half the canopy affected, removal and replanting on a raised mound with amended soil is more effective than treatment. Do not replant another ericaceous species in the same hole without addressing drainage.
Pruning After Bloom
Light shaping is appropriate immediately after bloom. Remove crossing branches, trim back leggy growth to a lateral bud or branch junction, and take out any dead wood you find during your inspection. Rhododendrons respond well to light, selective cuts made right now because the growth flush will fill in behind your cuts.
Two constraints apply. First, do not remove more than one-third of the live canopy in a single season. Rhododendrons store significant energy reserves in their foliage, and aggressive pruning while the plant is actively growing depletes those reserves at the worst possible time. Second, understand what you are cutting: the buds flanking each spent truss are next year’s flower buds. If you cut below them, you lose next year’s bloom at that location. Heading cuts that remove shoot tips also remove potential flower bud sites. Shape with restraint, and direct your cuts to branches that are growing in the wrong direction rather than shortening everything uniformly.
Hard renovation pruning (cutting back to bare wood to reduce an overgrown plant to framework) is a separate operation and a separate season. Late February through early March, before bud break, is the correct window. Hard-pruned rhododendrons resprout from dormant buds on old wood, but they need the full growing season to recover. Post-bloom renovation sacrifices both this year’s growth flush and next year’s flowers, and it stresses the plant during the period when it should be building reserves. If the plant needs hard renovation, note it now and schedule it for next winter.
When to hold off entirely: If your inspection revealed root problems, pest damage, or signs of decline, do not prune. A stressed plant needs every leaf it has. Pruning a compromised rhododendron forces it to divert energy from recovery to wound response and regrowth. Let it stabilize first. Come back to shaping next year when you can confirm the plant is growing normally.
Seasonal Action Summary
| When | What | Why |
|---|---|---|
| Bloom ends (mid-Apr to mid-May) | Snap spent trusses at base; rake fallen petals | Break Ovulinia petal blight cycle; remove developing sclerotia |
| Immediately post-bloom | Apply ericaceous fertilizer at drip line | Support growth flush; hard cutoff July 1 |
| Post-bloom | Flip leaves on sun-exposed branches | Scout for azalea lace bug nymphs (1st gen active at 1099 GDD₃₂) |
| Post-bloom | Check leaf margins, especially lower branches | Root weevil adult notching signals larval root damage |
| Post-bloom | Assess new growth flush quality and color | Diagnose root rot (poor flush), nutrient lockout (chlorosis) |
| Post-bloom | Soil test if not done in 2+ years | Verify pH 4.5-6.0; catch alkaline drift before chlorosis appears |
| Post-bloom | Light shaping cuts only; note hard renovation needs for February | Preserve next year’s flower buds; do not stress compromised plants |
| Late May through June | Apply beneficial nematodes if weevil notching present | Soil temp must exceed 55°F; target larvae, not adults |
| June | Apply EDDHA chelated iron if chlorosis is visible now | Immediate symptom relief while sulfur amendment takes effect |
Sources:
- NC State Extension: Deadheading technique, fertilizer timing and formulation (plants.ces.ncsu.edu)
- American Rhododendron Society: Cultivar quality ratings, cultural requirements (rhododendron.org)
- UC Davis IPM: Phytophthora root rot diagnostics, integrated pest management for ericaceous plants (ipm.ucanr.edu)
- Royal Horticultural Society: Rhododendron pruning, soil requirements, and iron deficiency management (rhs.org.uk)
- PNW Plant Disease Management Handbook: Ovulinia petal blight cultural controls (pnwhandbooks.org)
- WSU Extension: Acidifying soil for ericaceous plants, sulfur application rates for clay soils; HortSense rhododendron pest and disease fact sheets (pubs.extension.wsu.edu)
- OSU Extension: Rhododendron soil pH requirements, iron chelate recommendations (extension.oregonstate.edu)
- HortGuide field data: GDD₃₂ station readings, post-bloom timing observations, Kent clay soil experience
Pesticide disclaimer: Always read and follow the label. Product names are mentioned for educational purposes; no endorsement is intended. Pesticide registrations change; verify current registration status with the Washington State Department of Agriculture before purchasing or applying any product.